The Newcomer Guide to Setting Up Utilities (Hydro, Gas, Internet) in Canada
Arriving in Canada is a whirlwind, isn't it? You’ve navigated immigration, found a place, and maybe even started to settle in, only to realize that the most basic necessities – keeping the lights on, staying warm, and getting online – require a whole new learning curve. Trust me, you're not alone if you feel a bit overwhelmed by the process of setting up utilities like hydro, gas, and internet. This comprehensive guide is here to demystify these essential steps, offering a veteran expat’s perspective to help you get connected with minimal stress.
Understanding Canada's Utility Landscape: A Quick Primer
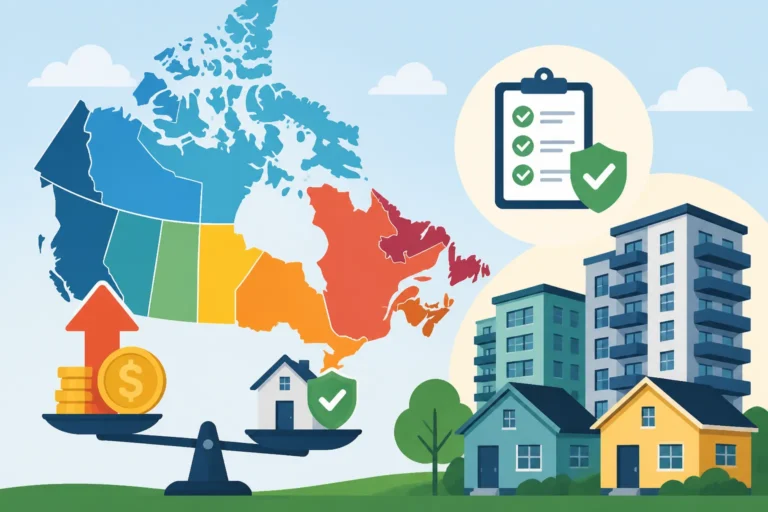
One of the first things many newcomers realize about Canada is that it's a vast country, and while there's a certain "Canadian way," things can vary significantly from province to province, and even city to city. Utilities are a prime example of this decentralization, which can be a bit of a headache when you're just trying to get settled.
Decentralized Systems: Why It Varies By Province
Unlike some countries where a single national entity might manage all utilities, Canada operates on a more fragmented system. This means that the company providing your electricity in Toronto (Ontario) will be different from the one supplying it in Vancouver (British Columbia) or Montreal (Quebec). It's not uncommon to hear people say things like, "Just call Hydro," but that "Hydro" could be Hydro One, BC Hydro, Hydro-Québec, Manitoba Hydro, or a host of other regional power authorities! This provincial and municipal autonomy extends to natural gas and, to a lesser extent, even internet and mobile services.
This variation can be incredibly frustrating. You might get advice from a friend who moved to a different province, only to find it doesn't apply to your situation. It's not about being unhelpful; it's simply a reflection of how Canada is structured. The key takeaway here is to always confirm the specific providers and rules for your particular city and province. Don't assume anything, because that's where you'll run into unexpected delays and complications. It truly feels like navigating a maze sometimes, but with a bit of local knowledge, it becomes manageable.
Public vs. Private Providers: What to Expect
When it comes to Canadian utilities, you'll generally encounter a mix of publicly-owned and privately-owned entities. This distinction influences how they operate, their pricing structures, and even their customer service approaches.
Electricity (or "hydro," as it's commonly called) and sometimes water services are often provided by public corporations or municipal departments. For example, BC Hydro in British Columbia and Hydro-Québec in Quebec are provincial Crown corporations, meaning they are owned by the provincial government. Their rates are typically regulated by a government body, aiming for stability and universal access. While you might not always love the price, there's usually less variability and fewer "deals" to chase, though they might offer energy conservation programs.
On the other hand, natural gas, internet, and mobile phone services are predominantly handled by private companies. This means you'll have more choices, but also more marketing, more price fluctuations, and the need to actively compare options. Companies like Enbridge Gas (Ontario) for natural gas, and giants like Bell, Rogers, and Telus for internet and mobile, are private entities competing for your business. The competition can sometimes work in your favour, leading to promotional rates, but it also means you need to be savvy and vigilant to ensure you're getting the best deal, especially after introductory periods expire. It's a different beast to deal with compared to the more predictable public utilities, and often requires more research and negotiation on your part.
Preparing Your Documents: What You'll Need
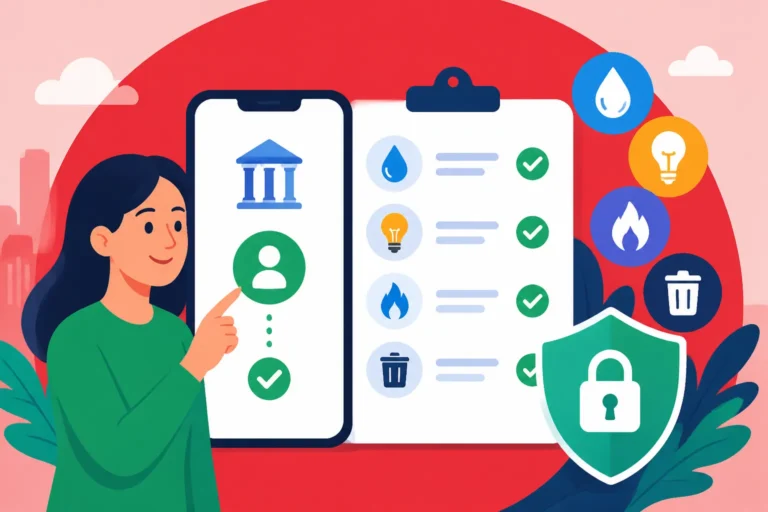
Before you even pick up the phone or open a browser to set up your utilities, gather your essential documents. This step will save you a world of frustration and countless hours. Think of it as your utility setup toolkit. Most providers will ask for similar information, and having it all at hand will make the process much smoother.
Here's a list of what you'll most likely need:
- Proof of Identity: Your Permanent Resident (PR) card, passport, or provincial driver's license are usually accepted. If you're still waiting for your PR card, your Confirmation of Permanent Residence (COPR) alongside your passport might suffice. Remember, establishing your identity is paramount.
- Proof of Address: This is crucial. Your signed lease agreement or property deed is the gold standard. If you’re living with family or in temporary accommodation, you might need a letter from the homeowner confirming your residence. Utility companies need to know where to connect service and who is responsible for the bill.
- Social Insurance Number (SIN): While not always mandatory for all utility setups, having your SIN ready is highly recommended, especially if you're applying for post-paid mobile plans or trying to avoid security deposits. It helps providers verify your identity and, if applicable, perform a credit check. If you haven't applied for one yet, read our guide on How to Apply for a Social Insurance Number (SIN) in Canada.
- Banking Information: Most utilities offer pre-authorized payments directly from your bank account, which is convenient and helps you avoid late fees. Have your bank account number and transit number (often found on a void cheque or in your online banking portal) ready. If you're still figuring out your finances, our article on How to Set Up Online and Mobile Banking in Canada might be helpful.
- Move-in Date: Be precise about the date you need services to start. This is especially important for hydro and gas, as they often require activation on a specific day.
- Previous Utility Account Number (if applicable): If you're taking over a previous tenant's account or moving within the same service area, sometimes having the old account number can streamline the process, though it's not always necessary.
Getting these documents in order beforehand is a small effort that pays massive dividends in reducing the administrative burden you’ll face as a newcomer.
Setting Up Your Electricity (Hydro) Service: Powering Your New Home
Getting your electricity connected is usually one of the first things on any newcomer's to-do list. In Canada, electricity is commonly referred to as "hydro," a nod to the country's extensive hydroelectric power generation. This step is non-negotiable for most homes, especially as you arrive and need to charge devices, light your new space, and power appliances.
Finding Your Hydro Provider: It's Not Always Obvious
The first hurdle is identifying which company provides electricity to your specific address. As we discussed, this isn't a national service. Your hydro provider is determined by your geographical location, often at the municipal or regional level. For instance, if you're in most parts of Ontario, you'll likely be dealing with Hydro One or your local municipal electricity provider like Toronto Hydro or Alectra Utilities. In British Columbia, it's typically BC Hydro, and in Quebec, Hydro-Québec. Each province has its own primary player, and sometimes several local distributors.
How do you find out? If you’re renting, ask your landlord or property manager. They'll know exactly which company serves the building. If you're buying a home, your real estate agent can point you in the right direction. A quick online search for "electricity provider [your city/town name] Canada" will usually get you to the right company website. It might seem like a simple step, but calling the wrong provider is a common time-waster for newcomers who are still figuring out the local landscape. Don't be shy to ask for help from someone who lives in the area; local knowledge is invaluable here.
The Application Process: Step-by-Step
Once you've identified your provider, the application process generally follows a few key steps:
- Contact the Provider: Most hydro companies allow you to apply online through their website, which is often the quickest and most convenient method. You can also call their customer service line. Be prepared for potentially long wait times on the phone, especially during peak moving seasons (like the end of the month).
- Provide Information: You'll need to supply your personal details (name, date of birth), your new Canadian address, and your move-in date. This is where your gathered documents, especially your proof of address and identification, come in handy. They might also ask for your SIN for identification and credit verification purposes.
- Security Deposit: Many utility companies, including hydro providers, may require a security deposit from new customers, particularly those without an established credit history in Canada. This can be a bit of a shock, as it's an unexpected upfront cost. The deposit amount can vary, but it's typically equivalent to about two to three months' estimated billing. The good news is that these deposits are usually refundable after a year or two of on-time payments, or when you close your account. Some providers might waive the deposit if you can provide a letter of reference from a previous utility company (from your home country, if applicable) or if a Canadian resident with good credit can act as a guarantor. Don't be afraid to ask about these options; every dollar counts when you're just starting out.
- Activation: You'll schedule an activation date, which should ideally be your move-in date or the day before. In most modern homes, with smart meters, activation can often happen remotely without a technician needing to enter your home. However, it’s always wise to confirm this during the application process.
The process is fairly standardized once you know who to call. Just take it one step at a time, and don't hesitate to ask questions if something isn't clear.
Understanding Your Hydro Bill: Beyond the Numbers
Once your hydro is connected, your first bill will inevitably arrive, and it can look like a cryptic puzzle. Understanding the different charges is key to managing your energy consumption and budget.
A typical Canadian hydro bill isn't just a flat rate for the power you use. It's usually broken down into several components:
- Consumption Charges: This is the core charge for the actual electricity you've consumed, measured in kilowatt-hours (kWh). You'll notice that many provinces, particularly Ontario, use a "time-of-use" (TOU) or "tiered" billing system. TOU means the price of electricity varies depending on the time of day: higher during "on-peak" hours (e.g., weekday mornings and evenings) and lower during "off-peak" hours (e.g., nights, weekends, and holidays). Tiered billing means you pay one rate for electricity up to a certain level of consumption, and a higher rate for anything above that threshold. Understanding these structures can help you adjust your habits, like running the dishwasher or laundry during off-peak hours, to save money.
- Delivery Charges: This isn't for the electricity itself, but for the cost of delivering it to your home through the poles, wires, and infrastructure. These charges also cover the maintenance of the system and the costs of reading your meter. This is often a fixed component and a variable one, based on your consumption.
- Regulatory Charges: These are charges approved by the provincial energy board or regulator to cover the costs of operating and maintaining the provincial electricity system, as well as various provincial programs.
- Debt Retirement Charge (historically): In some provinces like Ontario, this charge was previously levied to pay down residual debt from the former provincial utility. While largely phased out, it's an example of how historical factors can influence current billing.
- Taxes: Of course, there are applicable provincial and federal taxes (like HST/GST) added to your total.
When you first get your bill, don't just look at the total. Take the time to understand each line item. Many hydro providers offer online portals where you can track your daily or hourly consumption, which can be an incredibly powerful tool for identifying usage patterns and making adjustments. Keeping an eye on these details is part of managing The Complete Guide to Cost of Living in Canada for Newcomers (2026).
Connecting to Natural Gas: Staying Warm in Canadian Winters
For many parts of Canada, natural gas is an absolute lifesaver, especially during the colder months. It’s primarily used for heating your home, hot water, and sometimes for stoves and dryers. If you're coming from a warmer climate, the sheer necessity of reliable and efficient heating will quickly become apparent.
Identifying Your Gas Provider: Who Heats Your Home
Just like with hydro, natural gas services are managed regionally, not nationally. In Ontario, Enbridge Gas is the dominant provider for most of the province. In British Columbia, FortisBC covers a significant portion, and in Quebec, Énergir is the main distributor. Again, your specific location determines your provider.
It's important to confirm if your new home even uses natural gas. Not all homes do; some might rely entirely on electricity for heating and hot water. How can you tell? Check your thermostat—is it electric or gas-powered? Look at your furnace or water heater—do they have gas lines running to them? If you're unsure, ask your landlord, real estate agent, or a knowledgeable neighbour. It's a common misconception that all Canadian homes have gas; ensuring you need it before trying to connect it will save you a needless phone call. Knowing your heating source is crucial for preparing your home for winter, as outlined in Understanding How to Prepare Your Home for Winter in Canada.
The Gas Service Activation Process
Once you've confirmed that your home uses natural gas and identified your provider, the activation process mirrors that of electricity in many ways:
- Contact the Provider: You can typically apply online or by phone. Have your personal information, new address, and desired activation date ready.
- Documents: As with hydro, be ready to provide proof of identity, proof of address (your lease or deed is vital here), and your SIN. These documents ensure you can establish your account smoothly.
- Security Deposit: Similar to hydro, natural gas companies may also require a security deposit if you don't have an established Canadian credit history. Again, don't be surprised by this, and inquire about options to waive it if possible. Many newcomers find themselves paying multiple deposits when setting up utilities, so factor this into your initial budget.
- Technician Visit: This is a crucial difference from electricity. If the gas service at your address has been disconnected for a period (e.g., if the previous tenants moved out and the gas was shut off), the gas company will almost certainly require a technician to visit your home to safely turn on the gas and light your appliances. This is a safety measure to prevent gas leaks and ensure everything is functioning correctly. You'll need to be home for this appointment. Do not attempt to turn on gas yourself. This visit can sometimes require a booking in advance, so factor that into your moving timeline. Missing this appointment can delay your heating, which is the last thing you want as the temperatures drop.
This process ensures your gas supply is safe and ready for use, making those frosty Canadian mornings much more bearable.
Deciphering Your Gas Bill and Usage
Your natural gas bill, much like your electricity bill, comes with various charges beyond just the amount of gas you've used. Understanding these components is essential for effective budgeting.
Here’s a breakdown of what you’ll typically see:
- Commodity Charge: This is the cost of the natural gas itself, measured in cubic meters (m³) or gigajoules (GJ). The price of natural gas fluctuates based on market conditions, so this portion of your bill can vary from month to month, even with similar usage. Some providers offer fixed-rate plans, where you lock in a price per unit for a certain period, which can provide stability.
- Delivery/Distribution Charge: This covers the cost of transporting the natural gas through pipelines to your home, as well as the maintenance of the local distribution network. It often includes both a fixed monthly service charge and a variable charge based on your consumption.
- Carbon Tax (Federal Fuel Charge): This is a significant component that many newcomers are surprised by. Canada has a federal carbon pricing system (or similar provincial systems) aimed at reducing greenhouse gas emissions. This charge is applied to fossil fuels, including natural gas, and is clearly itemized on your bill. The amount you pay here directly correlates with your gas consumption, so reducing usage helps lower this tax.
- Storage and Transport Charges: These cover the costs associated with storing gas and moving it through larger transmission pipelines before it reaches the local distribution network.
- Taxes: Applicable HST/GST will be added to the total.
Because heating is a major part of your gas bill, especially in winter, your consumption will likely be much higher in colder months. This seasonal variation means your gas bill can fluctuate dramatically, potentially quadrupling or quintupling from summer to winter. Some providers offer an "equal billing plan" or "budget billing" where they estimate your annual usage and divide it into 12 equal monthly payments. This can help stabilize your monthly budget, avoiding huge spikes in winter. At the end of the year, your account is reconciled, and any overpayment is credited, or underpayment is charged. This is an excellent option for newcomers who are still figuring out their monthly expenses.
Getting Online: Your Essential Guide to Internet Services
In today's connected world, a reliable internet connection isn't a luxury; it's an absolute necessity. From applying for jobs and communicating with family to streaming entertainment and navigating your new city, getting online is paramount. This is one utility where you'll have more choices, and therefore, more comparison shopping to do.
Choosing an Internet Provider: The Battle for Bandwidth
Canada has a competitive internet service market, dominated by a few major players, but also populated by numerous smaller, often more affordable, alternatives. The "Big Three" telecommunications companies that own most of the infrastructure are Bell, Rogers, and Telus (with Shaw largely subsumed by Rogers now, mostly in Western Canada). These giants offer a full suite of services: internet, TV, and home phone.
However, many "reseller" or "independent" internet service providers (ISPs) operate by leasing bandwidth from these larger networks. Companies like TekSavvy, Virgin Plus (owned by Bell), Fido (owned by Rogers), Distributel, and Cogeco (in some regions) often offer similar service at lower prices. They use the same lines and infrastructure as the major providers, so reliability is often comparable, but their customer service might be more personalized or, conversely, less extensive. It's often worth looking into these smaller providers as they can offer significant savings.
When choosing, you'll encounter different connection types:
- Fibre Optic (FTTH – Fibre to the Home): This is the gold standard, offering the fastest and most reliable speeds. If fibre is available in your building or neighbourhood, it's generally the best choice for speed and future-proofing.
- Cable Internet: Very common, offered by providers like Rogers and Shaw. It uses coaxial cables, often shared with TV services, and offers good speeds, though it can sometimes experience slowdowns during peak usage hours in your neighbourhood.
- DSL (Digital Subscriber Line): This uses traditional phone lines. While widely available, it generally offers slower speeds than cable or fibre, making it less ideal for heavy internet users or multiple devices.
Always check what's available at your specific address. Not all connection types are offered everywhere. Websites like BroadbandSearch or independent comparison sites can help you identify providers in your area. Also, consider your initial connectivity needs. Before you even have home internet set up, having a temporary solution like an eSIM from a provider like Airalo can be a real lifesaver for navigating, communicating, and managing essential tasks from day one.
Installation and Activation: The Waiting Game
Once you've chosen a provider and a plan, you'll need to arrange for installation and activation. This process can vary depending on the connection type and provider:
- Self-Installation Kits: For cable or DSL internet, many providers offer self-installation kits. They send you the modem/router, and you follow instructions to plug it in yourself. This is usually faster and avoids a technician visit fee. However, if your home has never had service before, or if the wiring is old, you might still need a technician.
- Technician Installation: Fibre optic connections almost always require a technician to visit your home to run the fibre line, install the necessary equipment, and ensure everything is working correctly. Even for cable or DSL, if a self-install fails or the wiring needs attention, a technician will be dispatched.
The "waiting game" part comes with scheduling. Technician appointments can sometimes be booked a week or two out, especially in busy cities or during peak moving seasons. It's crucial to schedule this as soon as you confirm your move-in date to minimize the time you're without internet. Missing a scheduled appointment can lead to rebooking delays and potential fees, so make sure you're home during the designated window.
Understanding Internet Plans and Costs
Internet plans in Canada are primarily differentiated by speed (measured in Megabits per second, or Mbps) and monthly cost. Data caps, which were once common, are becoming less prevalent, with many providers now offering "unlimited" data. However, be aware that "unlimited" sometimes comes with a caveat: after a very high threshold (e.g., 500 GB or 1 TB), your speeds might be "throttled" or reduced.
Here’s what to look for:
- Speed: Consider your household's usage.
- 50-100 Mbps: Good for light to moderate use, single users, basic streaming, and browsing.
- 150-300 Mbps: Ideal for small families, multiple streamers, online gaming, and working from home.
- 500 Mbps – 1 Gbps (Gigabit): Best for large households, heavy gamers, 4K streaming, and multiple users with high bandwidth demands.
- Promotional Rates: Almost every provider offers attractive introductory rates for the first 6, 12, or 24 months. Be vigilant about the regular price after the promotion ends. Set a reminder in your calendar to re-evaluate your plan before the promotional period expires. You can often call your provider and negotiate a new deal or threaten to switch to a competitor to get a better rate.
- Bundled Services: Providers will often try to "bundle" internet with TV and home phone services for a seemingly discounted price. While this can sometimes offer savings, critically evaluate if you actually need all those services. With streaming services prevalent, many newcomers find they don't need traditional cable TV. A home phone is also often redundant with mobile phones. Don't pay for what you won't use.
- Equipment Rental Fees: Check if the modem/router rental is included in the monthly price or an additional fee. Some providers allow you to purchase your own compatible equipment, which can save you money in the long run.
Shopping for internet can feel like a maze of numbers and fine print. Take your time, compare options carefully, and don't hesitate to ask providers to clarify anything you don't understand. Our guide on How to Choose a Mobile and Internet Provider in Canada offers more specific advice on navigating these choices.
Mobile Phone Service: Staying Connected on the Go
Beyond your home internet, a Canadian mobile phone number and reliable service are practically non-negotiable for daily life. You’ll need it for everything from job applications and setting up banking to ordering food and simply connecting with new friends. Getting connected quickly and affordably is a top priority for newcomers.
Navigating Canadian Mobile Carriers: The Big Three and Beyond
The Canadian mobile market is dominated by three major network owners: Bell, Rogers, and Telus. These companies own and operate the vast majority of the cellular infrastructure across the country, providing extensive coverage and generally high-quality service. However, their plans can often be quite expensive, especially if you're looking for large data allowances or the latest phones on contract.
To offer more competitive price points, these "Big Three" also operate "flanker brands" or sub-brands that use their parent company's networks but often have simpler plans and lower overheads. Examples include:
- Rogers' flanker brands: Fido, Chatr
- Bell's flanker brands: Virgin Plus, Lucky Mobile
- Telus's flanker brands: Koodo Mobile, Public Mobile
Additionally, there are independent Mobile Virtual Network Operators (MVNOs) and regional carriers. Freedom Mobile (now owned by Videotron) is a significant regional player, primarily in urban centres in Ontario, Alberta, and British Columbia, often offering more aggressive pricing, though its network coverage can be more limited outside major cities. MVNOs like PC Mobile or 7-Eleven Speak Out Wireless also exist, reselling network access from the major players, usually with basic prepaid plans.
For newcomers, an immediate concern is staying connected from the moment you land. Using an international roaming plan can be prohibitively expensive. This is where solutions like an eSIM from a global provider like Airalo can be incredibly useful. You can purchase a local or regional data plan for Canada before you even arrive, activate it instantly on your compatible smartphone, and have data for maps, messaging, and initial communications without hunting for a local SIM card the moment you clear customs. This bridges the gap until you can properly set up your Canadian mobile plan.
Choosing a Plan: Contract vs. Prepaid, Data Needs
Deciding on a mobile plan involves weighing several factors, especially for newcomers who might not have an established Canadian credit history.
- Post-paid (Contract) Plans: These involve signing up for a monthly plan, often for 12 or 24 months, sometimes with a subsidized phone. They usually offer better value for data, unlimited talk and text, and access to the latest devices. However, they almost always require a credit check. For newcomers without a Canadian credit history, getting approved for a post-paid plan can be challenging. Some providers might ask for a security deposit or require you to start with a prepaid plan to build a payment history.
- Prepaid Plans: These are an excellent option for newcomers, as they don't require a credit check. You pay upfront for a set amount of talk, text, and data, and you top up your balance as needed. While generally more expensive per gigabyte of data, the flexibility and lack of credit requirements make them very attractive initially. You can start with a basic prepaid plan, get your Canadian number, and then switch to a post-paid plan once you've built some credit history (e.g., after 6-12 months of paying other utility bills on time or getting a secured credit card).
- Data Needs: This is often the biggest cost driver. Be realistic about how much data you'll use. If you'll be relying on public Wi-Fi at home, work, and cafes, you might not need a massive data plan. But if you stream a lot, use navigation apps frequently, or depend on your phone for work outside of Wi-Fi zones, a larger data package (e.g., 20GB+) is advisable. Be mindful of "unlimited" plans, as they often come with speed restrictions after a certain data threshold.
Activating Your Service and Number Porting
Getting your new Canadian mobile service active is typically a straightforward process once you've chosen a plan:
- Get a SIM Card: For most plans, you'll receive a physical SIM card. You can pick these up in-store at any carrier outlet or authorized dealer. Some providers will mail them to you if you sign up online. Modern phones might also support eSIM technology, where the "SIM" is embedded in your phone and can be provisioned digitally, eliminating the need for a physical card.
- Activation: This can usually be done online, through an app, or by calling customer service. You'll need your SIM card number, the phone's IMEI (International Mobile Equipment Identity) number, and your personal details.
- Choosing a Number: If you're a newcomer, you'll generally be assigned a new Canadian phone number with a local area code. There's no "number porting" from your old international number in most cases, so be prepared to update all your contacts.
- Credit Check for Post-paid: As mentioned, if you opt for a post-paid plan, a credit check will be performed. If you have no Canadian credit history, you might be asked for a larger security deposit or advised to start with prepaid. Building credit in Canada is an important process, and you can learn more about it in our guide on How to Build a Credit Score as a Newcomer in Canada.
Getting your Canadian mobile number is a significant step towards feeling truly connected and integrated into your new life here.
Water, Waste & Other Essential Services: Beyond the Big Three
While hydro, gas, and internet are often top of mind, there are other crucial services that ensure your home is fully functional and compliant with local regulations. These often include water, wastewater, and waste collection, which can sometimes be overlooked until the first bill arrives or you miss a pickup day.
Water and Wastewater: Often Tied to Your Rent
Water and wastewater services (sewerage) are generally managed at the municipal level in Canada. This means your city or town is responsible for providing clean drinking water and managing the treatment of wastewater. The billing structure for these services can vary significantly based on your living situation:
- For Renters: If you're renting an apartment or a unit in a multi-residential building, the cost of water and wastewater is very often included in your monthly rent. This is a huge convenience, as it means one less utility bill to manage. Always confirm this with your landlord or in your lease agreement. If it's included, you don't need to do anything to set up this service.
- For Homeowners (and some renters): If you own a house or are renting a standalone property, you will almost certainly receive a separate bill for water and wastewater directly from your municipality. Billing is typically done on a metered basis, meaning you pay for the amount of water you consume, plus charges for wastewater treatment, which are often calculated as a percentage of your water usage.
If you are responsible for setting up a water account, the process is usually simple. Contact your municipal water department (often found on your city's official website). You’ll need to provide your address, move-in date, and personal identification. They will then set up an account in your name. Like other utilities, they may ask for a security deposit if you're a new customer without Canadian credit history, though this is less common for water than for hydro or gas. Ensure you understand if your water usage will be metered or if there is a flat rate, as this will impact your budget.
Waste Collection and Recycling: Local Rules Apply
Waste collection and recycling services are exclusively managed by your local municipality. This is where the term "hyper-local" truly applies: the rules, schedules, and types of bins can vary not just by city, but sometimes even by neighborhood within the same city! It's one of those things that seems simple but can cause a lot of confusion and even fines if you don't get it right.
Here's what you need to know:
- Schedules: Each street or area has specific days for garbage pickup and recycling pickup. These are often published on your municipal website. Some cities have bi-weekly collection for certain bins. Make sure you know your schedule.
- Bin Types and Sorting: Canadian municipalities are generally very serious about recycling and composting. You'll likely have multiple bins:
- Garbage/Waste: For non-recyclable, non-compostable items.
- Recycling (Blue Bin/Green Bin etc.): For paper, cardboard, plastics, glass, metals. Crucially, these often need to be separated into specific categories (e.g., plastics in one bin, paper in another), or all together in one bin (single-stream recycling).
- Organic/Compost (Green Bin/Brown Bin): For food scraps, yard waste, and other compostable materials.
- Specialized Collection: For larger items (furniture, appliances), hazardous waste (batteries, paints), or electronic waste, there are usually specific drop-off locations or scheduled special collection days, often requiring advance booking and sometimes a fee.
- Placement: Bins must be placed at the curb on the designated collection day, often by a specific time (e.g., 7:00 AM), and removed promptly after collection. There are often rules about how close to the curb they should be, and how far from mailboxes or other obstacles.
Your city's website will be your best friend for all things waste and recycling. Look for a "Waste Management" or "Recycling" section. Ignorance of the rules is not an excuse, and improperly sorted waste or missed collection days can be a nuisance and, in some cases, result in fines.
Property Management and Condo Fees: If Applicable
For newcomers who are renting, the good news is that many of these "extra" services are handled by your landlord or property management company. Things like building maintenance, snow removal (a huge one in winter!), and sometimes even certain utilities are covered as part of your rent. This is why understanding The Complete Guide to Renting an Apartment in Canada (2027) is so important.
If you purchase a condominium (a very popular housing option in major Canadian cities), you'll encounter condo fees (also known as common element fees). These are monthly payments to the condominium corporation that cover the costs of maintaining the common areas of the building and property. This can include:
- Building insurance: For the structure itself.
- Maintenance: Cleaning of hallways, elevators, gyms, pools, landscaping, snow removal.
- Utilities for common areas: Electricity for lighting, heating for shared spaces.
- Sometimes: Your personal heating, cooling, or even water might be included in your condo fees, depending on the building. Always clarify what's covered.
- Reserve Fund: A portion of your fees goes into a reserve fund for major repairs and replacements (e.g., new roof, elevator repairs).
Condo fees can be substantial, so it's critical to understand what they cover and what they don't cover before buying a unit. They are an ongoing cost in addition to your mortgage, property taxes, and other personal utilities, and they can increase over time.
Saving Money on Utilities: Tips and Tricks for Newcomers
Canadian winters can be expensive, and utility bills can easily consume a significant portion of your budget if you're not careful. As a newcomer, every dollar saved is a dollar earned. Here are some seasoned tips and tricks to help you keep those utility costs in check.
Energy Efficiency: Small Changes, Big Savings
Making conscious choices about how you use energy can lead to noticeable savings over time. These aren't just for homeowners; renters can also implement many of these strategies.
- Lighting: Switch to LED light bulbs. They use significantly less electricity and last much longer than traditional incandescent bulbs. It's a small upfront investment that pays off quickly.
- Smart Thermostats: Consider installing a smart thermostat (like a Nest or Ecobee, if your landlord allows and your heating system is compatible). These devices learn your schedule, optimize heating and cooling, and can be controlled remotely. This is particularly useful in Canada, where temperatures fluctuate dramatically, and precise temperature control can save a lot on gas and hydro.
- Unplug Electronics: Many electronics consume "phantom load" power even when turned off but still plugged in. Unplug chargers, TVs, computers, and other devices when not in use. Using power bars with on/off switches makes this easier.
- Efficient Appliance Usage:
- Laundry: Wash clothes in cold water whenever possible. Full loads are more efficient than partial ones. Clean the lint filter in your dryer before each use to improve efficiency.
- Dishwasher: Run only full loads. Use the air-dry setting instead of heated dry.
- Refrigerator: Ensure the seals on your fridge and freezer are tight. Don't leave the door open for extended periods.
- Seal Drafts: Even in a rental, you can often address drafts. Use weatherstripping or caulk around leaky windows and doors. Install door sweeps under exterior doors. This prevents warm air from escaping in winter and cool air from escaping in summer, directly impacting your heating and cooling costs.
- Window Coverings: Close blinds and curtains at night in winter to help insulate against cold windows. In summer, close them during the day to block out heat.
- Thermostat Settings: In winter, aim for a comfortable but not overly warm indoor temperature, perhaps around 20-21°C (68-70°F) when home, and slightly lower (17-18°C or 62-64°F) when sleeping or away. Every degree you lower your thermostat can save you a few percentage points on your heating bill. In summer, try to set your air conditioning a bit higher, perhaps 24-25°C (75-77°F).
These small habits, when consistently applied, can significantly reduce your overall utility consumption and costs.
Comparing Providers and Bundling Deals
In competitive markets like internet and mobile, complacency can cost you. Don't be afraid to shop around.
- Regularly Review Plans: Set a reminder to review your internet and mobile plans every 12-24 months, especially before any promotional rates expire. The market is constantly changing, and new, better deals often emerge.
- Don't Be Afraid to Switch (or Threaten To): Loyalty rarely pays off with telecom companies. If a competitor offers a significantly better deal, call your current provider's "retention" or "cancellations" department. They often have unadvertised deals they can offer to keep you as a customer, sometimes matching or beating competitor prices. Be polite but firm in your intentions to switch if they can't offer something comparable.
- Bundling: Proceed with Caution: While providers often push "bundle" deals (internet, TV, home phone), critically assess if you need all the services. Many newcomers find they can get by perfectly well with just internet and mobile, using streaming services for entertainment. A true saving is only a saving if you genuinely use and need all components of the bundle. Sometimes, buying services separately from different providers can actually be cheaper.
- Reseller ISPs: For internet, remember the smaller reseller ISPs (like TekSavvy, Virgin Plus, Fido). They often offer more affordable rates for similar speeds because they lease infrastructure from the major players, avoiding the high overheads of maintaining their own networks. They are definitely worth looking into, especially if you're comfortable with slightly less premium customer service.
Staying informed and actively seeking better deals is key to minimizing your monthly outgoings.
Understanding Assistance Programs
While navigating your initial setup and trying to budget for The Complete Guide to Cost of Living in Canada for Newcomers (2026), it's reassuring to know that some provinces and utility companies offer programs designed to help low-income households or encourage energy efficiency.
- Low-Income Energy Assistance Programs (LEAP): Many provinces have programs like LEAP in Ontario, which provides emergency financial assistance to eligible low-income customers to help them pay their electricity or natural gas bills and avoid disconnection.
- Energy Conservation Programs: Utility providers often offer rebates or incentives for upgrading to energy-efficient appliances, insulation, or smart thermostats. These programs are designed to reduce overall energy consumption and can provide significant upfront savings on efficiency upgrades.
- Arrears Management Programs (AMP): Some utilities have programs that help customers with outstanding balances manage their debt through grants or payment plans, provided they meet specific criteria.
Eligibility for these programs is usually based on household income and the number of residents. It's always worth checking the websites of your provincial government and your specific hydro and gas providers for details on available programs. Don't be shy about inquiring; these programs are designed to help residents, and as a newcomer, you might be eligible for support you didn't even know existed. Accessing these programs can provide crucial relief during what is often a financially challenging period of adjustment.
Troubleshooting Common Utility Issues: What to Do When Things Go Wrong
Even with the best planning, sometimes things go awry. Power outages, internet disruptions, or billing errors are a part of life, and knowing how to handle them calmly and effectively can save you a lot of stress. As a newcomer, these situations can feel even more daunting, but you’ll gain confidence with experience.
Dealing with Outages and Service Interruptions
Power outages, especially during severe weather like winter storms or summer thunderstorms, are not uncommon in Canada. Internet service can also go down unexpectedly.
- For Power Outages (Hydro):
- Check for Local Outages: Your first step should be to check your utility provider's website. Most hydro companies (e.g., Hydro One, BC Hydro, Hydro-Québec) have an "Outage Map" or "Outage Centre" online that shows reported outages, estimated restoration times, and affected areas. This saves you from calling customer service unnecessarily.
- Report the Outage: If your outage isn't listed, or if you're the first to notice, call your hydro provider's emergency line. Have your address and account number ready.
- Safety First: During an outage, switch off major appliances to prevent surges when power returns. Keep refrigerator and freezer doors closed. Never use a BBQ or generator indoors due to carbon monoxide risks. Have flashlights and a battery-powered radio handy. If you see downed power lines, stay far away and call 911 immediately.
- For Internet/Phone Service Interruptions:
- Check Status Pages: Your internet or mobile provider (Bell, Rogers, Telus, TekSavvy, etc.) will usually have a service status page on their website or app. Check there first.
- Restart Equipment: For internet issues, a simple restart of your modem and router often resolves common glitches. Unplug them for 30 seconds, then plug them back in.
- Contact Support: If the issue persists, call your provider's technical support line. Be prepared to describe the problem clearly and follow their troubleshooting steps.
Remember to keep your phone charged, as it’s your lifeline during an outage. If you are experiencing a medical emergency during an outage, call 911. You can find more comprehensive information on this topic in Emergency Medical Care in Canada: What Every Newcomer Needs to Know.
Billing Disputes and Customer Service Challenges
Dealing with customer service in any new country can be frustrating, and Canada is no exception. Long wait times, confusing explanations, and feeling like your issue isn't being heard are common complaints. But don't give up!
- Keep Records: Always keep detailed records of your interactions: dates and times of calls, names of agents you spoke to, reference numbers, and a summary of the conversation. This documentation is invaluable if you need to escalate an issue.
- Be Clear and Specific: When calling or writing, clearly state your account number, the specific issue (e.g., "I was overcharged on my hydro bill for June"), and what resolution you're seeking.
- Escalate When Necessary: If you're not getting a satisfactory resolution from the first-line customer service representative, politely ask to speak with a supervisor or manager. If that still doesn't work, inquire about their formal complaint process.
- Ombudsman Services (for telecom): For internet and mobile phone issues, if you've exhausted your provider's internal complaint process, you can escalate your complaint to the Commission for Complaints for Telecom-television Services (CCTS). This is an independent organization that helps resolve disputes between consumers and telecom providers.
- Provincial Regulators: For hydro and gas, most provinces have an energy board or utility commission that oversees providers and can sometimes intervene in unresolved disputes, though this is usually a last resort for significant issues.
Patience and persistence are key here. Understand that the person on the other end of the line is often just following procedures, but being polite yet firm in advocating for yourself will get you further. Understanding the Canadian Workplace Culture: A Complete Guide for Newcomers can also help set expectations for these interactions.
Moving Out: Disconnecting Services Gracefully
When the time comes to move to a new home within Canada, or even leave the country, you’ll need to officially disconnect your utility services. This isn't just a courtesy; it's crucial to avoid being billed for services after you've left.
- Give Ample Notice: Contact your utility providers (hydro, gas, internet, mobile) at least 1-2 weeks before your move-out date to schedule the disconnection. Some companies might even prefer more notice.
- Provide Your Move-Out Date: Be precise about the date you need services to end. For hydro and gas, this often involves a final meter reading on that day.
- Forwarding Address: Provide a forwarding address for your final bill. If you're leaving Canada, ensure you can access this bill online or arrange for someone trustworthy to receive it for you. This is also important if you're expecting a refund for any security deposits you paid.
- Return Equipment: For internet and TV services, you will often need to return rented modems, routers, and set-top boxes. Your provider will give you instructions on how to do this (e.g., drop off at a retail store, mail it back). Failure to return equipment can result in significant unreturned equipment charges.
- Final Readings: For hydro and gas, ensure that a final meter reading is taken on your move-out day. If a technician needs to come, schedule this accordingly. This ensures you're only billed for your actual consumption up to the moment you leave.
- Cancelling Mobile Plans: If you're on a contract, understand any early cancellation fees. If you're leaving Canada, you might need to pay off the remaining balance on your phone if it was subsidized.
Remember, the goal is a smooth transition without unexpected charges popping up months later. Speaking of smooth transitions, when it's time to pack up your entire life, services like Sirelo can connect you with international moving companies that understand the complexities of relocating, whether within Canada or to a new country. Plan ahead, communicate clearly with your providers, and you’ll successfully close out this chapter of your utility management in Canada.
Utility Setup Checklist for Newcomers
| Utility Service | Typical Providers (Examples) | Key Documents Needed | Setup Steps (General) | Important Considerations |
|---|---|---|---|---|
| Electricity (Hydro) | Hydro One, BC Hydro, Hydro-Québec, Toronto Hydro | ID, Proof of Address (Lease), SIN, Move-in Date | Identify local provider, Apply online/phone, Arrange activation | Security deposit often required for newcomers. Understand time-of-use (TOU) or tiered billing. |
| Natural Gas | Enbridge Gas, FortisBC, Énergir | ID, Proof of Address (Lease), SIN, Move-in Date | Identify local provider, Apply online/phone, Schedule technician visit | Security deposit often required. Technician visit usually mandatory for connection. Seasonal bill fluctuations (winter). |
| Internet | Bell, Rogers, Telus, Shaw (West), TekSavvy, Fido | ID, Proof of Address (Lease), Banking Info | Choose provider/plan, Order equipment, Schedule installation/self-install | Compare speeds/data caps. Look for promo rates. Consider resellers. Technician visit for fibre; self-install for cable/DSL. |
| Mobile Phone | Bell, Rogers, Telus; Fido, Virgin Plus, Koodo, Public | ID, (SIN for post-paid), Banking Info (post-paid) | Choose provider/plan, Get SIM card, Activate service | Prepaid (no credit check) vs. Post-paid (credit check). Consider eSIM for initial connectivity (e.g., Airalo). |
| Water/Wastewater | Municipal Water Department (e.g., City of Toronto) | ID, Proof of Address (Lease), Move-in Date | Usually included in rent for apartments; homeowners contact city | Often included in rent. For homeowners, billed by municipality (metered). Less common for deposit. |
| Waste Collection | Municipal Waste Management Department | N/A (Rules apply to address) | N/A (Follow municipal schedules & sorting rules) | Strict local rules for garbage, recycling, compost. Check municipal website for schedules and sorting instructions. |
Disclaimer
Please note that the information provided in this guide is intended for general informational purposes only and may not apply to every specific situation. Utility providers, regulations, and available programs can change frequently and vary significantly by province and municipality in Canada. While we strive to offer accurate and up-to-date advice based on current knowledge and search results (as of 2026), it is always recommended to verify details directly with the relevant utility providers, government authorities, or qualified professionals before making any decisions. The author and publisher are not responsible for any actions taken based on the information in this guide.